Mochitest is an automated testing framework built on top of the MochiKit JavaScript libraries. It's just one of the automated regression testing frameworks used by Mozilla. Tests report success or failure to the test harness using JavaScript function calls.
Mochitest's use of JavaScript function calls to communicate test success or failure can make it unsuitable for certain types of test. Only things that can in some way be tested using JavaScript (with chrome privileges!) can be tested with this framework. Given some creativity, that's actually much more than you might first think, but it's not possible to write Mochitest tests to directly test a non-scripted C++ component, for example. (Use a compiled-code test to do that.)
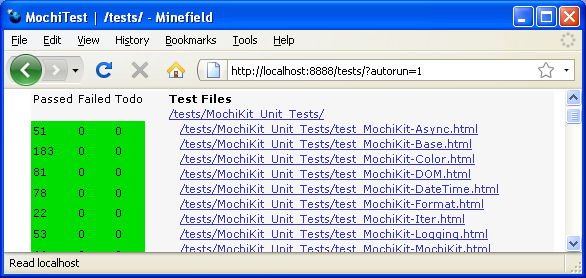
Running tests
The Mozilla build machines run Mochitest as part of the build and test process, so we get to know pretty quickly if someone commits a change to the source code that breaks something. However, you should still run Mochitest yourself before you commit any risky new code. You don't want to be the one who wastes everyone's time by breaking the tree if you can help it. :-)
Running the whole test suite
To run Mochitest, first build Mozilla with your changes; then run
./mach mochitest
Note: you should keep focus on the browser window while the test are being run, as some may fail otherwise (like the one for bug 330705 for example). Linux users can save themselves this inconvenience by using a dummy X server (see Diverting X output below).
This will run every flavor and subsuite (see Running flavors and subsuites below) of mochitest which will take a very long time. Because tests require focus, running the full suite locally isn't always feasible or necessary. A good compromise is to run tests that you suspect will be affected by the changes you made (such as tests in the same directory as the code you touched) locally. If that passes, then you can run the full suite of tests on try if you think it necessary.
Running select tests
To run a single test (perhaps a new test you just added) or a subset of the entire Mochitest suite, pass a path parameter to the mach command. For example, to run only the test test_CrossSiteXHR.html in the Mozilla source tree, you would run this command:
./machmochitestdom/security/test/cors/test_CrossSiteXHR.html
To run all the tests in dom/svg/, this command would work:
./mach mochitest dom/svg/
Note that the path specified is the path to the test or directory within the Mozilla source tree. If the path is a directory, then the tests in that directory and all of its subdirectories will be loaded.
Running flavors and subsuites
Flavors are variations on the configuration used to run mochitest. For example, a flavor might have a slightly different set of prefs set for it, a custom extension installed or even run in a completely different scope. The mochitest flavors are:
- plain - The most basic and common mochitest. They run in content scope, but can access certain whitelisted privleged APIs with SpecialPowers.
- browser - These often test the browser UI itself and run in chrome scope. More information can be found here.
- chrome - These run in chrome scope and are typically used for testing privileged JavaScript APIs. More information can be found here.
- a11y - These test the accessibility interfaces. They can be found under the top 'accessible' directory.
- jetpack-addon- Test jetpack addon (more info needed).
- jetpack-package - Test jetpack package (more info needed).
A subsuite is similar to a flavor, except that it has an identical configuration. It is just logically separated from the "default" subsuite for display purposes. For example, devtools is a subsuite of the browser flavor. There is no difference in how these two jobs get run. It exists solely so the devtools team can more easily see and run their tests.
Note: To make matters more complicated, there is also a concept of tags. Subsuites and tags will both logically group related sets of test. The difference between between them, is that applying a subsuite to a test removes that test from the default set. Whereas a tag will not remove it from the default set.
By default, mach will find and run every test in the given subdirectory (or topscrdir if none specified) no matter which flavor or subsuite it belongs to. But sometimes, you might only want to run a specific flavor or subsuite. This can be accomplished using --flavor (or -f) and --subsuite respectively. For example:
./mach mochitest -f plain                        # runs all plain tests
./mach mochitest -f browser --subsuite devtools  # runs all browser tests in the devtools subsuite
./mach mochitest -f chrome dom/indexedDB         # runs all chrome tests in the dom/indexedDB subdirectory
In many cases it won't be necessary to filter by flavor or subsuite as running specific directories will do it implicitly. For example running:
./mach mochitest browser/devtools
is a rough equivalent to running the devtools subsuite. There is an edge case where you might only want to run tests that don't belong to any subsuite. To do this, use:
./mach mochitest --subsuite default
Note: Before June 1st 2015 each flavor had its own specific mach command (e.g mach mochitest-plain). These have been removed and replaced by --flavor.
Running specific chunks
The entire mochitest suite takes a long time, so to get results in automation faster they are split up into groups called "chunks". On desktop, mochitest is grouped into 5 different chunks. You can easily run mochitest-1 through mochitest-5 like so:
./mach test mochitest-1
On other platforms, mochitest can be grouped in to more or fewer chunks. To mimic this, you can pass in --total-chunks and --this-chunk. For example, if the platform has 9 chunks and you want to run the 3rd one:
./mach mochitest -f plain --total-chunks 9 --this-chunk 3
Running tests on comm-central (Thunderbird, SeaMonkey)
Currently (as of August 2013) you cannot use mach to run tests in comm-central applications. You need to run the "old" pymake commands inside the obj-dir (if you use one). See pymake for how to use pymake on Windows. For example, to run only the test test_CrossSiteXHR.html in the Mozilla source tree, you would run this command:
TEST_PATH=content/base/test/test_CrossSiteXHR.html make -C $(OBJDIR) mochitest-plainNote that mochitest-plain is an example. There are multiple categories of mochitests. Depending on the test you want to run, use either mochitest-plain, mochitest-chrome, mochitest-browser-chrome, mochitest-a11y or mochitest-ipcplugins.
To run all the tests in http://mxr.mozilla.org/comm-central/source/suite/common/, this command would work:
TEST_PATH=suite/common/ make -C $(OBJDIR) mochitest-chrome
Note that currently (due to bug 907434) you must not specify any objdir in your .mozconfig. You need to use the default one to be able to run tests! If you don't like the default choice, you can use symbolic links (also works on Windows, see the bug for details) to redirect the objdir to another folder.
Running mochitests under Electrolysis (e10s) for Fennec
To run your mochitest in a child tab process, all you need to do is run it in a tree that's built for fennec, i.e. was configured with
ac_add_options --enable-application=mobile
OMG it's so easy! (This works for Linux desktop fennec builds, and ought to for Windows and Android builds. OSX may vary depending on the state of our e10s implementation there.)
On Mac, it is necessary to patch automation.py to remove the unconditional "-bin" appended to the appname, and then run mochitests with the following invocation:
EXTRA_TEST_ARGS="--appname=dist/FennecDebug.app/Contents/MacOS/fennec"
Running mochitests under Electrolysis (e10s) for Desktop builds.
To run your mochitest in an electrolysis environment for desktop, specify an --e10s option to mach's mochitest command (eg, ./mach mochitest-browser --e10s ...). This will cause the profile created for testing to have the preference browser.tabs.remote set to true before starting the test suite.
Running and debugging mochitests on Android
Instructions on how to run Mochitests in Firefox Mobile (Fennec) on Android are over on wiki.mozilla.org, as are instruction on how to use remote debugging to debug Mochitests on Firefox Mobile (Fennec) on Android.
Running failed tests
After running mochitests, you might have some errors. If you do, you can run make mochitest-plain-rerun-failures to run just the tests that failed
make mochitest-plain
make mochitest-plain-rerun-failures
This feature is possible by writing a failures.json file to the root of the mochitest directory ($(objdir)/_tests/testing/mochitest) during the first run. When rerunning the failures, it uses the --run-only-tests flag to just run the tests in the failures.json file.
Note: This functionality was broken in mach, bug 1155231 tracks re-implenting it.
Debugging individual tests
If you need to debug an individual test, you can generally use the aforementioned method for running only that test, attach a debugger to Firefox, and just reload the page containing the test with the debugger attached. If attaching a debugger before the problem shows up is hard (for example, if the browser crashes as the test is loading), you can specify a debugger when you run mochitest:
./mach mochitest --debugger=gdb ...
See also the --debugger-args and --debugger-interactive arguments.
You can also use the --jsdebugger argument to debug JavaScript.
Finding errors
Search for the string "TEST-UNEXPECTED-FAIL" to find unexpected failures. You can also search for "SimpleTest FINISHED" to see the final test summary. This is particularly useful when viewing full Tinderbox logs, since the Mochitest output isn't necessarily at the end of the combined log.
Logging results
The output from a test run can be sent to the console and/or a file (by default the results are only displayed in the browser). There are several levels of detail to choose from. The levels are DEBUG, INFO, WARNING, ERROR and CRITICAL, where DEBUG produces the highest detail (everything), and CRITICAL produces the least.
Mochitest uses structured logging. This means that you can use a set of command line arguments to configure the log output. To log to stdout using the mach formatter and log to a file the raw json logs, you can use --log-mach=- --log-raw=mochitest.log. By default the file logging level for all your formatters is INFO but you can change this using --log-mach-level=LEVEL.
To turn on logging to the console use --console-level=LEVEL.
For example, to log test run output with the default (tbpl) formatter to the file ~/mochitest.log at DEBUG level detail you would use:
./mach mochitest --log-tbpl=~/mochitest.log --log-tbpl-level=DEBUG
Diverting X output
The tests must run in a focused window, which effectively prevents any other user activity on the engaged computer. Linux users can reclaim their boxes by telling the suite to use a hidden virtual desktop. If xvfb is or can be installed, the following command launches the tests without blocking the active session:
nice xvfb-run mach mochitest ...
Other possible configurations have also been discussed in bug 434365.
Running tests without mach
You can also run tests without a build environment or mach. The easiest way to do this is to download the tests.zip file corresponding to your platform, and extract it, and then follow these directions, which assume you have both pip and virtualenv installed.
cd $tests_zip
virtualenv venv # create your virtualenv
source venv/bin/activate # activate your virtualenv
cd config
pip install -r mozbase_requirements.txt
cd ../mochitest
python runtests.py --help
Other runtests.py options
The runtests.py script recognizes several other options, to see the full list of options run:
./mach mochitest --help
Other resources:
Writing tests
A Mochitest test is simply an HTML, XHTML or XUL file that contains some JavaScript to test for some condition(s).
You can use Mochitest maker to run most tests without having to build Mozilla.
Try to avoid Mochitest
Yes, really. For many things Mochitest is overkill. In general you should always try to use one of the lighter-weight testing frameworks. For example, if you only want to test a single XPCOM component then you should use xpcshell. On the other hand there are some things that Mochitest cannot do, or isn't designed to do. For example, for visual output tests you should try to use the reftest framework. For more information on the different types of automated testing frameworks see Mozilla automated testing.
Best practices
Please follow the tips for Avoiding intermittent test failures when writing tests.
Test templates
You can avoid typing out boilerplate by using the gen_template.pl perl script to generate a test template. This script takes two optional arguments:
-b: a bug number-type: template type. {html|xhtml|xul|chrome}. defaults tohtml.
For example:
cd testing/mochitest/
perl gen_template.pl -b=123456 --type=plain > path/to/test_bug123456.html
perl gen_template.pl -b=123456 --type=xul > path/to/test_bug123456.xul
Note that Mochitest requires the file name of all tests to begin with the string "test_", while mochitest-browser-chrome tests must begin with "browser_". See the section below for help on deciding where your tests should go in the tree.
In addition to Mochitest boilerplate code, the script will generate an element with the id 'content' and an element with the id 'display'. Your test may manipulate these elements as well as other elements you add to the page.
Asynchronous Tests
Sometimes tests involve asynchronous patterns, such as waiting for events or observers. In these cases, you will need to call waitForExplicitFinish and finish like so:
SimpleTest.waitForExplicitFinish();
addEventListener("keypress", function() {
  // ... run test ...
  SimpleTest.finish();
}, false);
// ... simulate key press ...
If you need more time, requestLongerTimeout(number) can be quite useful. requestLongerTimeout() takes an integer factor that is a multiplier for the the default 45 seconds timeout. So a factor of 2 means: "Wait for at last 90s (2*45s)". This is really useful if you want to pause exection to do a little debugging.
Test functions
Each test must contain some JavaScript that will run and tell Mochitest whether the test has passed or failed. SimpleTest.js provides a number of functions for the test to use that communicate the pass/fail to Mochitest. These include:
ok(expressionThatShouldBeTrue, "Description of the check")-- tests a value for truthinessis(actualValue, expectedValue, "Description of the check")-- compares two values (using ===)isnot(actualValue, unexpectedValue, "Description of the check")-- opposite of is()
If you want to include a test for something that currently fails, don't just comment it out! Instead, use one of the "todo" equivalents so Tinderbox can notice if it suddenly starts passing (at which point the test can be reenabled):
todo(falseButShouldBeTrue, "Description of the check")todo_is(actualValue, expectedValue, "Description of the check")todo_isnot(actualValue, unexpectedValue, "Description of the check")
Additionally, tests can use the assertion methods provided by Assert.jsm. It implements the CommonJS Unit Testing specification version 1.1, which provides a basic, standardized interface for performing in-code logical assertions with optional, customizable error reporting. Usage of these functions is strongly discouraged in mochitest-plain and mochitest-chrome tests.
These function include:
export_assertions()- Call this function to tack all the assertion methods defined in Assert.jsm to the tests' global scope. These methods are already available on the global Assert object, but authors might find this not convenient enough.Assert.ok(value, message)Assert.equal(actual, expected, message)Assert.notEqual(actual, expected, message)Assert.deepEqual(actual, expected, message)Assert.notDeepEqual(actual, expected, message)Assert.strictEqual(actual, expected, message)Assert.notStrictEqual(actual, expected, message)Assert.throws(block, expected, message)
Tests can call a function info("Message string") to write a message to the test log.
Helper functions
Right now, useful helpers derived from MochiKit are available in testing/mochitest/tests/SimpleTest/SimpleTest.js, but all of Mochikit is available at testing/mochitest/MochiKit, but please only include files that you require to minimize test load times. bug 367569 added sendChar, sendKey, and sendString helpers. These are available in testing/mochitest/tests/SimpleTest/EventUtils.js.
If you need to access some data files from your mochitest, you can get an URI for them, by using SimpleTest.getTestFileURL("relative/path/to/data.file") . Then you can eventually fetch their content by using XMLHttpRequest.
Adding tests to the tree
Once you've written a new test you need to add it to the Mozilla source tree and tell the build system about it so that the Mozilla tinderboxes will run it automatically.
Choosing a location
New Mochitest tests should go somewhere close to the code they are testing, hopefully in the same module, so that ownership of the test cases is clear. For example, if you create a new test for some HTML feature, you probably want to put the test in content/html/content/test or content/html/document/test. If a test directory does not exist near the code you are testing you can add a new test directory as the patch in bug 368531 demonstrates.
Add an entry to mochitest.ini
To tell the build system about your new test you need to add your test file to the mochitest.ini in your test's directory. For example, let's say you are adding a new test called 'test_new_feature.html'. Simply edit the mochitest.ini (or chrome.ini etc. depending on the mochitest flavor) in the same directory and add a new line:
[test_new_feature.html]
Optionally you can specify metadata for your test, like whether to skip the test on certain platforms:
[test_new_feature.html]
skip-if = os == 'win'
The mochitest.ini format, recognized by the parser, defines a long list of metadata.
Adding a new mochitest.ini or chrome.ini file
If a manifest.ini or chrome.ini file does not exist in the test directory you want to add a test, you have to add mochitest.ini / chrome.ini depending your test to the moz.build file in the directory for your test. For example, in gfx/layers/moz.build, we add these two manifest files:
MOCHITEST_MANIFESTS += ['apz/test/mochitest.ini']
MOCHITEST_CHROME_MANIFESTS += ['apz/test/chrome.ini']
Building and running new tests
Before committing a new test you should check that the Makefile.in changes are correct and that your tests pass as you expect them to. To check your test, first export it to the Mochitest directory by running the command:
./mach build path
giving the path of the directory that contains the test file. Now run Mochitest as explained above.
SSL and https-enabled tests
Mochitests must be run from http://mochi.test/ to succeed; however, some tests may require use of additional protocols, hosts, or ports to test cross-origin functionality. The Mochitest harness addresses this need by mirroring all content of the original server onto a variety of other servers through the magic of proxy autoconfig and SSL tunneling. The full list of schemes, hosts, and ports on which tests are served, all of which serve exactly the same content as http://mochi.test/, is specified in build/pgo/server-locations.txt. Note, however, that not all origins described there are equivalent: some specify particular SSL certificates for testing purposes, while some allow pages on that server to request elevated privileges; read the file for full details.
How it works
The Mochitest harness includes preference values which cause the browser to use proxy autoconfig to match requested URLs with servers. The network.proxy.autoconfig_url preference is set to a data: URL which encodes a JavaScript function, FindProxyForURL, which determines the host to which a given URL is mapped. In the case of SSL sites to be mirrored, the function maps them to an SSL tunnel which transparently forwards the traffic to the actual server, as per the description of the CONNECT method given in RFC 2817. In this manner a single HTTP server at http://127.0.0.1:8888 can successfully emulate dozens of servers at distinct locations.
For further details on Mochitest SSL functionality and how to modify it to change a certificate or add a new https server, see Modifying Mochitest SSL behavior.
Getting Stack Traces
To get stack when Mochitest crashes:
- Get a
minidump_stackwalkbinary for your platform fromhttp://hg.mozilla.org/build/tools/file/tip/breakpad/ - Set the
MINIDUMP_STACKWALKenvironment variable to point to the absolute path of the binary.
If the resulting stack trace doesn't have line numbers, run make buildsymbols to generate the requisite symbol files. See Building Firefox with Debug Symbols for more information.
FAQ
What if my tests aren't done when onload fires?
Call SimpleTest.waitForExplicitFinish() before onload fires. Then, when you're done, call SimpleTest.finish().
How can I get the full log output for my test in automation for debugging?
Add the following to your test:
SimpleTest.requestCompleteLog();What if I need to change a preference to run my test?
The SpecialPowers object provides APIs to get and set preferences.
var oldVal = SpecialPowers.getIntPref("dom.max_script_run_time");
SpecialPowers.setIntPref("dom.max_script_run_time", 0);
// do what you need
SpecialPowers.setIntPref("dom.max_script_run_time", oldVal);
If you need to change a pref when running a test locally, you can set the environment variable EXTRA_TEST_ARGS when running the mochitest-plain make target.
EXTRA_TEST_ARGS='--setpref=javascript.options.jit.chrome=false'
If you need to change a string pref, enclose the value in backslash-escaped double quotes:
EXTRA_TEST_ARGS='--setpref=webgl.osmesa=\"libOSMesa.so.6\"'
Can tests be run under a chrome URL?
Yes, use ./mach mochitest-chrome. Keep in mind that the xpcshell test harness should be your first choice for XPCOM testing. Only use mochitest if you need events, browser features, networking, etc.
How can I get around the error "Permission denied to get property XPCComponents.classes"?
If your test needs to perform very specific privileged actions, you should either use one of the existing SpecialPowers APIs, or see if you can add a new API to the SpecialPowers object. If your test needs to use a wide variety of privileged objects and APIs, you should write your test as a Chrome Mochitest instead.
enablePrivilege in new tests. It will be removed in a future version of Gecko.How do I change the HTTP headers or status sent with a file used in a Mochitest?
Create a text file next to the file whose headers you want to modify. The name of the text file should be the name of the file whose headers you're modifying followed by ^headers^. For example, if you have a file foo.jpg, the text file should be named foo.jpg^headers^. (Don't try to actually use the headers file in any other way in the test, because the HTTP server's hidden-file functionality prevents any file ending in exactly one ^ from being served.) Edit the file to contain the headers and/or status you want to set, like so:
HTTP 404 Not Found
Content-Type: text/html
Random-Header-of-Doom: 17
The first line sets the HTTP status and (optionally a) description associated with the file. This line is optional; you don't need it if you're fine with the normal response status and description. Any other lines in the file describe additional headers which you want to add or overwrite (most typically the Content-Type header, for the latter case) on the response. The format follows the conventions of HTTP, except that you don't need to have HTTP line endings and you can't use a header more than once (the last line for a particular header wins). The file may end with at most one blank line to match Unix text file conventions, but the trailing newline isn't strictly necessary.
How do I test issues which only show up when tests are run across domains?
The Mochitest harness runs one web server to serve tests, but through the magic of proxy autoconfig, all test files are available on a variety of different domains and ports. The full list of domains and ports on which tests are served, all of which serve exactly the same content as http://mochi.test/, is specified in build/pgo/server-locations.txt. If your test needs to violate cross-origin security to test something, please consult with a Mochitest peer about your options, as they are still in development.
enablePrivilege in new tests. It will be removed in a future version of Gecko.How do I write tests that check header values, method types, etc. of HTTP requests?
To write such a test, you simply need to write an SJS (server-side JavaScript) for it. An SJS is simply a JavaScript file with the extension .sjs which is loaded in a sandbox. Don't forget to reference it from your "mochitest.ini" file too!
[DEFAULT]
  support-files =
    test_file.sjs
The global property handleRequest defined by the script is then executed with request and response objects, and the script populates the response based on the information in the request.
Here's an example of a simple SJS:
function handleRequest(request, response) {
  //Allow cross-origin, so you can XHR to it!
  response.setHeader("Access-Control-Allow-Origin", "*", false);
  // avoid confusing cache behaviors
  response.setHeader("Cache-Control", "no-cache", false);
  response.setHeader("Content-Type", "text/plain", false);
  response.write("Hello world!");
}
The file is run, for example, at etiher http://mochi.test:8888/tests/PATH/TO/YOUR/test_file.sjs, http://{server-location}/tests/PATH/TO/YOUR/test_file.sjs - see build/pgo/server-locations.txt for server locations! Note the "test/tests" bit at the front of the URL. If you want to actually execute the file, you need to reference it somehow. For instance, you can XHR to it OR you could use a HTML element:
var xhr = new XMLHttpRequest();
xhr.open("GET", "http://test/tests/dom/manifest/test/test_file.sjs");
xhr.onload = function(e){ console.log("loaded!", this.responseText)}
xhr.send();
The exact properties of the request and response parameters are defined in the nsIHttpRequestMetadata and nsIHttpResponse interfaces in nsIHttpServer.idl. However, here are a few useful ones:
Properties and methods of Request object
- .scheme
- string, the scheme of the request.
- .host
- string, the host of the request
- .port
- string, the port of the request.
- .method
- string, the HTTP method.
- .httpVersion
- string, the protocol version, typically "1.1".
- .path
- string, path of the request,
- .headers
- object, name and values representing the headers.
- .queryString
- string, the query string of the requested URL.
- .bodyInputStream
- ??
- .getHeader( name )
- Gets a request header by name.
- .hasHeader( name )
- Boolean, checks if a header was provided with the request.
Note: the browser is free to cache responses generated by your script, so if you ever want an SJS to return different data for multiple requests to the same URL, you should add a Cache-Control: no-cache header to the response to prevent the test from accidentally failing if it's manually run multiple times in the same Mochitest session.
How do I keep state across loads of different server-side scripts?
Server-side scripts in Mochitest are run inside sandboxes, with a new sandbox created for each new load. Consequently, any variables set in a handler don't persist across loads. To support state storage, use the getState(k) and setState(k, v) methods defined on the global object. These methods expose a key-value storage mechanism for the server, with keys and values as strings. (Use JSON to store objects and other structured data.) Note that because the myriad servers in Mochitest are in reality a single server with some proxying and tunnelling magic, stored state is the same in all servers at all times.
The getState and setState methods are scoped to the path being loaded. For example, the absolute URLs /foo/bar/baz, /foo/bar/baz?quux, and /foo/bar/baz#fnord all share the same state; the state for /foo/bar is entirely separate. You should use per-path state whenever possible to avoid inter-test dependencies and bugs. However, in rare cases it may be necessary for two scripts to collaborate in some manner, and it may not be possible to use a custom query string to request divergent behaviors from the script. For this use case only you should use the getSharedState(k, v) and setSharedState(k, v) methods defined on the global object. No restrictions are placed on access to this whole-server shared state, and any script may add new state that any other script may delete. To avoid conflicts, you should use a key within a faux namespace so as to avoid accidental conflicts as far as is possible; for example, if you needed shared state for an HTML5 video test, you might use a key like dom.media.video:sharedState.
A further form of state storage is provided by the getObjectState(k) and setObjectState(k, v) methods, which will store any nsISupports object. These methods reside on the nsIHttpServer interface in this form, but a limitation of the sandbox object used by the server to process SJS responses means that the former is present in the SJS request handler's global environment with the signature getObjectState(k, callback), where callback is a function to be invoked by getObjectState with the object corresponding to the provided key as the sole argument. Note that this value mapping requires the value to be an XPCOM object; an arbitrary JavaScript object with no QueryInterface method is insufficient. If you wish to store a JavaScript object, you may find it useful to provide the object with a QueryInterface implementation and then make use of wrappedJSObject to reveal the actual JavaScript object through the wrapping performed by XPConnect.
For further details on state-saving mechanisms provided by httpd.js, see netwerk/test/httpserver/nsIHttpServer.idl and the nsIHttpServer.get(Shared|Object)?State methods.
How do I write a SJS script which responds asynchronously
Sometimes you need to respond to a request asynchronously, for example after waiting for a short period of time. You can do this by using the processAsync() and finish() functions on the response object passed to the handleRequest() function.
processAsync() must be called before returning from handleRequest(). Once called, you can at any point call methods on the request object to send more of the response. Once you are done, call the finish() function. For example you can use the setState()/getState() functions described above to store a request and later retrieve and finish it. However be aware the the browser often reorders requests and so your code must be resilient to that to avoid intermittent failures.
var timer = null;
function handleRequest(request, response)
{
  response.processAsync();
  response.setHeader("Content-Type", "text/plain", false);
  response.write("hello...");
  timer = Components.classes["@mozilla.org/timer;1"].createInstance(Components.interfaces.nsITimer);
  timer.initWithCallback(function()
  {
    response.write("world!");
    response.finish();
  }, 5 * 1000 /* milliseconds */, Components.interfaces.nsITimer.TYPE_ONE_SHOT);
}
For more details, see the processAsync() function documentation in netwerk/test/httpserver/nsIHttpServer.idl.
How do I get access to the files on the server as XPCOM objects from an SJS script? (1.9.3 or later)
If you need access to a file, say, because it's easier to store image data in a file than directly in an SJS script, use the presupplied SERVER_ROOT object state available to SJS scripts running in Mochitest:
function handleRequest(req, res)
{
  var file;
  getObjectState("SERVER_ROOT", function(serverRoot)
  {
    file = serverRoot.getFile("tests/content/media/test/320x240.ogv");
  });
  // file is now an XPCOM object referring to the given file
  res.write("file: " + file);
}
The path you specify is used as a path relative to the root directory served by httpd.js , and an nsIFile corresponding to the file at that location is returned. Beware of typos: the file you specify doesn't actually have to exist because file objects are mere encapsulations of string paths.