| Oracle® Database Administrator's Guide 11g Release 2 (11.2) Part Number E25494-02 |
|
|
PDF · Mobi · ePub |
| Oracle® Database Administrator's Guide 11g Release 2 (11.2) Part Number E25494-02 |
|
|
PDF · Mobi · ePub |
In the rare case that a SQL statement fails with a critical error, you can run the SQL Repair Advisor to try to repair the failed statement.
This section covers the following topics:
You run the SQL Repair Advisor after a SQL statement fails with a critical error. The advisor analyzes the statement and in many cases recommends a patch to repair the statement. If you implement the recommendation, the applied SQL patch circumvents the failure by causing the query optimizer to choose an alternate execution plan for future executions.
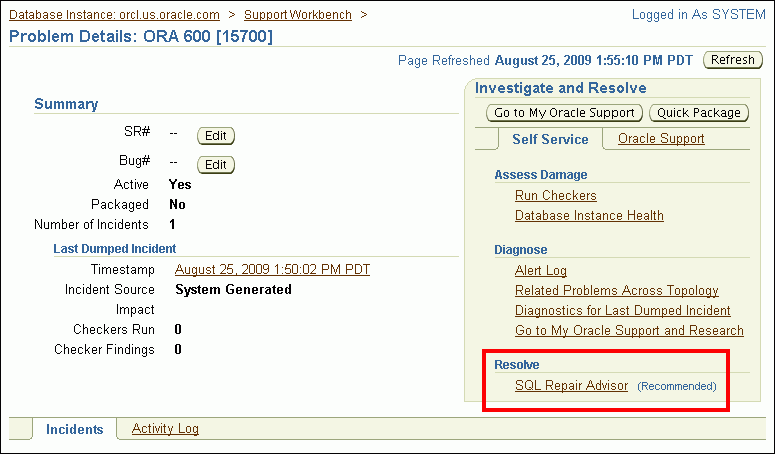
You run the SQL Repair Advisor from the Problem Details page of the Support Workbench. The instructions in this section assume that you were already notified of a critical error caused by your SQL statement and that you followed the workflow described in "Investigating, Reporting, and Resolving a Problem".
To run the SQL Repair Advisor:
Access the Problem Details page for the problem that pertains to the failed SQL statement.
See "Viewing Problems with the Enterprise Manager Support Workbench" for instructions.
In the Investigate and Resolve section, under the Self Service tab, under the Resolve heading, click SQL Repair Advisor.

On the SQL Repair Advisor page, complete these steps:
Modify the preset task name if desired, optionally enter a task description, modify or clear the optional time limit for the advisor task, and adjust settings to schedule the advisor to run either immediately or at a future date and time.
Click Submit.
A "Processing" page appears. After a short delay, the SQL Repair Results page appears.

A check mark in the SQL Patch column indicates that a recommendation is present. The absence of a check mark in this column means that the SQL Repair Advisor was unable to devise a patch for the SQL statement.
Note:
If the SQL Repair Results page fails to appear, then complete these steps to display it:Go to the Database Home page.
Under Related Links, click Advisor Central.
On the Advisor Central page, in the Results list, locate the most recent entry for the SQL Repair Advisor.
Select the entry and click View Result.
If a recommendation is present (there is a check mark in the SQL Patch column), click View to view the recommendation.
The Repair Recommendations page appears, showing the recommended patch for the statement.
Click Implement.
The SQL Repair Results page returns, showing a confirmation message.
(Optional) Click Verify using SQL Worksheet to run the statement in the SQL worksheet and verify that the patch successfully repaired the statement.
After you apply a SQL patch with the SQL Repair Advisor, you may want to view it to confirm its presence, disable it, or remove it. One reason to remove a patch is if you install a later release of Oracle Database that fixes the bug that caused the failure in the patched SQL statement.
To view, disable, or remove a SQL patch:
Access the Database Home page in Enterprise Manager.
For Oracle Enterprise Manager Database Control, see Oracle Database 2 Day DBA for instructions. For Oracle Enterprise Manager Grid Control, go to the desired database target.
At the top of the page, click Server to display the Server page.
In the Query Optimizer section, click SQL Plan Control.
The SQL Plan Control page appears. See the online help for information about this page.
At the top of the page, click SQL Patch to display the SQL Patch subpage.
The SQL Patch subpage displays all SQL patches in the database.
Locate the desired patch by examining the associated SQL text.
Click the SQL text to view the complete text of the statement.
To disable the patch, select it, and then click Disable.
A confirmation message appears, and the patch status changes to DISABLED. You can later reenable the patch by selecting it and clicking Enable.
To remove the patch, select it, and then click Drop.
A confirmation message appears.
See Also:
"About the SQL Repair Advisor"