In Mozilla, we use the the Mercurial version control system (Hg) to manage our source code and localizations. Mercurial allows localizers to work locally (on their machines) and then push (an Hg term) changes to a remote repository, which usually is hosted on the Mozilla servers (hg.mozilla.org). Localizing current versions of Firefox, Thunderbird and SeaMonkey includes working with Mercurial. If the documentation is incomplete or you have questions, please drop by the #l10n or #hg channels on irc.mozilla.org. The Mercurial FAQ are also worth a read, should you run into trouble.
For the eager and quick, below you'll find instructions on installing and configuring Mercurial, instructions on receiving an Hg account commit priviledges, as well as a few tasks you can complete without account priviledges.
Installing Mercurial
Follow the instructions below to install Mercurial on your system. Once you've installed Mercurial, we'll walk through the steps to configure it.
Mercurial on Linux
You can easily install Mercurial from the command line by issuing one of the following commands. Choose the appropriate command for your distribution and make sure to run as root.
# Debian/ubuntu
$ apt-get install mercurial
# Fedora
$ yum install mercurial
# Gentoo
$ emerge mercurial
# Arch Linux
$ pacman -S mercurial
# OpenSolaris
$ pkg install SUNWmercurial
If you prefer a graphical interface, you can download and install MercurialEclipse here.
Did it work?
Open a Terminal window and enter hg --version. If you see a message about the version of Mercurial (e.g. Mercurial Distributed SCM (version 1.3.1)), you have installed Mercurial successfully!
More details
For more details on installing Hg on Linux systems, refer to the instructions on Mercurial's Download page.
Mercurial on Windows
With Windows, you have a couple of install options:
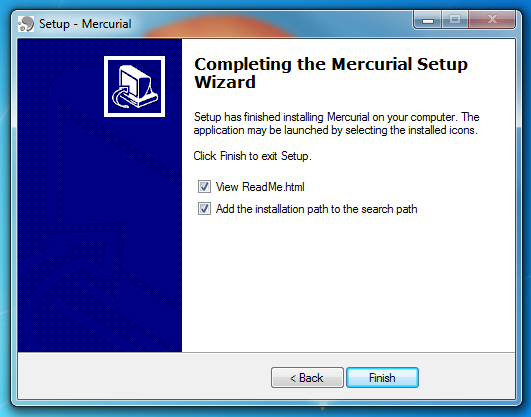
- For a command line interface, download and install MozillaBuild package. This will not only install Hg, but also all the tools required to build Mozilla products on Windows. Trust us, you'll want this eventually.
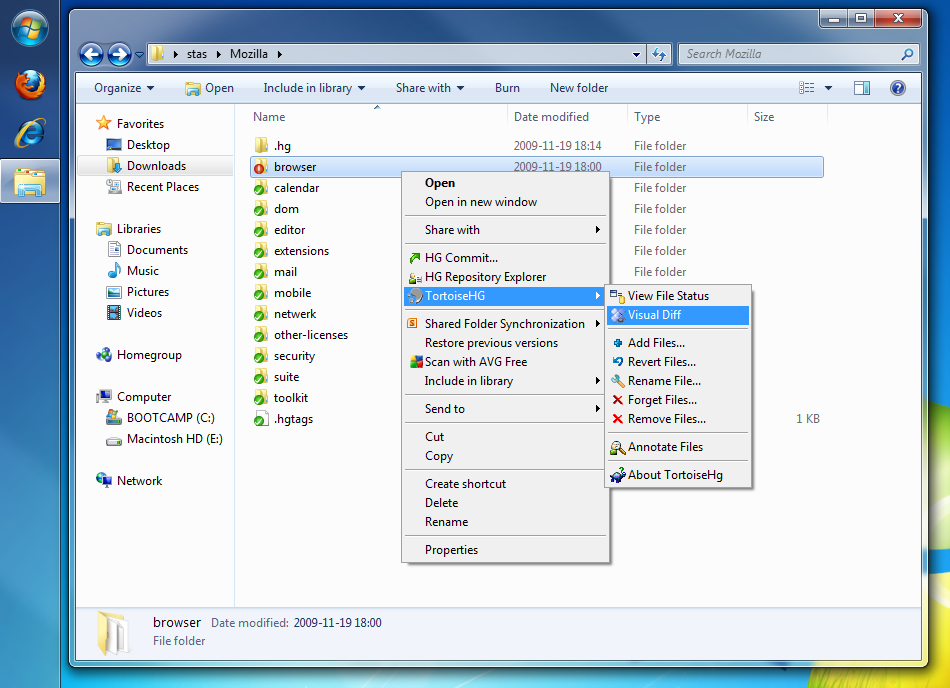
 For a graphical interface, you may want to install TortoiseHg, which integrates with your Windows Explorer shell. It also installs the command line utility.
 Part of the command line Hg install for Windows involves making sure the
 hg executable is in the system's %PATH% variable (TortoiseHg doesn't need this step). Use the add_path.exe utility found in C:\mozilla-build\hg to do this.
PS C:\Users\your_id> cd C:\mozilla-build\hg
PS C:\mozilla-build\hg> .\add_path.exe /result .
Note the dot (".") at the end of the second command, which means the current directory. If the utility modified your %PATH% successfully, a dialog will open saying, "%PATH% has been updated correctly."
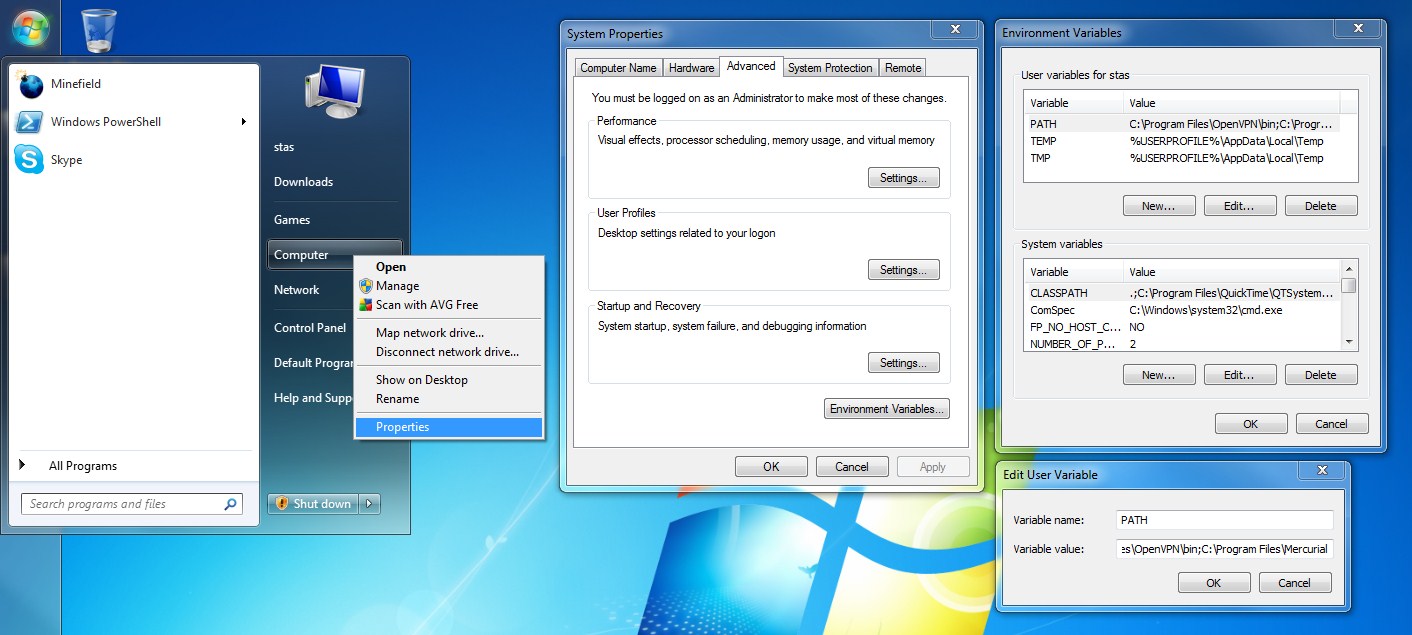
Alternatively, you can edit the %PATH% variable manually. In order to do so, right-click on your computer icon, choose Properties > Advanced > Environmental Variables, select PATH and click Edit. If you don't see PATH among the options, you'll have to click Add and edit it within the Add dialog. See the screenshot for an example.
Did it work?
- Go to
Start > Run... - Type
cmd.exeand clickOK. A new shell window should appear. - Type
hg --versionin the new shell window. If you see a message about the version of Mercurial (e.g.Mercurial Distributed SCM (version 1.3.1)), you have installed Mercurial successfully!
More details
For more details on installing Hg on Windows, refer to the instructions on Mercurial's Download page.
Mercurial on Mac OSX
Installing Hg on Mac OSX is super easy. You can install Mercurial via MacPorts through the Terminal, like so:
$ sudo port install mercurial
You can also install it by downloading the dmg package from the Hg download page. It has an install dialog that will walk you through the process.
If you prefer a graphical interface, you can download and install MercurialEclipse here.
Did it work?
Open a Terminal window and type hg --version. If you see a message about the version of Mercurial (e.g. Mercurial Distributed SCM (version 1.3.1)), you have installed Mercurial successfully!
More details
For more details on installing Hg on Mac OSX, refer to the instructions on Mercurial's Download page.
Configuring Mercurial
Once you've installed Mercurial, you'll need to configure it before you can use it successfully.
Your Mercurial configuration is contained within a config file which you must create yourself. Your config file is called either ~/.hgrc (UNIX systems) or Mercurial.ini (Windows), depending on your operating system.
Your config file should have the following settings:
[ui]
username = Your Real Name <user@example.com>
merge = internal:merge
[defaults]
commit = -v
[diff]
git = 1
showfunc = 1
unified = 8
To configure Hg, follow these steps:
- Create a new file in your favorite text editor.
- Copy the settings above and paste them into your new file.
- Save the file as either
.hgrc(UNIX systems) orMercurial.ini(Windows) and save it in either$HOME/orC:\mozilla-build\hg\orC:\Program Files\Mercurial\.
Now that you've installed and configured Mercurial, here are a few tasks you can do without Hg commit access priviledges.
Cloning and updating repositories
There are a couple of repostiories that contain en-US source files that most locales will want to deal with.
- mozilla-central contains the files for Firefox Nightly.
- comm-central contains the files for SeaMonkey and Thunderbird which are not already part of Firefox.
- l10n-central contains all of the L10n repos for Firefox Nightly.
When you get the comm-central repository, this will include the mozilla-central repository as well. You can therefore use the one set up for developing Firefox, SeaMonkey and Thunderbird without having to pull mozilla-central a second time.
Here's how to get (or clone) your en-US source files for the first time:
- Run the following command in the command line to get the source en-US files for Firefox:
hg clone https://hg.mozilla.org/mozilla-central/
This will create a clone of the mozilla-central repository in the directory mozilla-central.
- Run the following commands in the command line to get the source en-US files for any combination of Firefox, SeaMonkey, Thunderbird:
hg clone https://hg.mozilla.org/comm-central/
cd comm-central
python client.py checkout
The first command will create a clone of the comm-central repository. The second command will move you into that directory. The third command will do a clone of mozilla-central, and pull some other hg repositories. The other directories are required for SeaMonkey and Thunderbird.
- Cloning your localization repository for the first time is just as easy. For example, to clone your Firefox Nightly L10n repo, run the following command, replacing ab-CD with your locale code:
hg clone https://hg.mozilla.org/l10n-central/ab-CD/
Updating your local repos
- To update your working copy of mozilla-central, go to your local mozilla-central directory and run:
hg pull -u
This will both get new changesets from mozilla-central and apply those changes in your working copy.
- To update your working copy of comm-central, go to your comm-central directory and run:
python client.py checkout
This will both get new changesets from comm-central, mozilla-central and the other appropriate locations and apply those changes in your working copy.
- To update your local L10n repo after your first clone, run this command from your local L10n directory:
hg pull -u
Creating L10n patches
Another thing you can do with Hg without needing account priviledges is creating L10n patches of your work for someone else to commit to your remote L10n repo on the Mozilla servers. Doing this ensures that your dashboards are always accurate, as they look at your remote repo.
Here's how to create a L10n patch with Hg and the Mq extension:
- Enable Mq by adding
hg.ext =to your Mercurial config file (~/.hgrcon Unix-like systems orMercurial.inion Windows) under the[extensions]section. - Open your command line tool and navigate to your L10n directory.
- Inside your L10n directory, init your repo with Mq by running
hg init --mq. - To create a new patch, run
hg qnew -m "Your commit message" patch-name.patch. The commit message should take the form of "Bug 123456 - Change this thing to work better by doing something; r=reviewers" if you are to fix a bug. - Make your change.
- Once you finish making your change, run
hg qrefreshto commit your changes to the patch. - Navigate to your
<repository>/.hg/patchesto find your.patch. - You may repeat from step 4 to create another patch. Your patches will be incremental, i.e. new patches are created based on old patches. If you want to commit all the patches to the repository and cleanup the patch queue, run
hg qfinish.
Please refer to MqTutorial and Mq documentation for further uses of Mq extension to manage patches.
Mercurial account priviledges
Eventually, you or your team leader will need Hg account priviledges. Let's face it, it's just more convenient to commit and push your work to the remote repo yourself, rather than creating patches and asking someone else to push them for you.
To get write access to the l10n hg repositories on the Mozilla server, there's a bit of paper work to be done. The localization team owner needs to file a bug requesting an hg account. This bug will request level 1 L10n priviledges. You need to follow the instructions regarding the contributor form. Write access to the hg repositories requires a ''voucher'', which, for the owner, will be done based on the review by Mozilla. For peers of a localization, the owner can vouch (once she or he is registered).
Sending changes to Mozilla
Now that you have Hg account privileges, you can send your work to Mozilla all by yourself. Here are the steps to send your L10n work using Mercurial:
- Since your L10n work takes place in your own local repository, you should ensure that there are no changes made to the remote repository before committing your work. To do this, update your locale, as per the section above.
- After finishing a change or set of changes and checking you have updated to the latest, you should commit by entering this command:
hg commit -m "your message identifying the change (bug 555)"
Committing won’t send your changes to Mozilla’s repository, but prepares them for it. The next step will send your changes to your remote repo via push.
- To push to mozilla-hosted repositories, you have to have committer access, and you must edit the file
(your-local-hg-root AKA the directory you pulled your locale into)/.hg/hgrc(note, this is NOT your~/.hgrc) to add these lines (replacing ab-CD with your locale code):
[paths]
default = https://hg.mozilla.org/l10n-central/ab-CD/
default-push = ssh://hg.mozilla.org/l10n-central/ab-CD/
- You’ll also need to tell ssh which account to use for your pushes, too, by editing
~/.ssh/configand adding these lines, whereuser@host.domainis your account:
Host hg.mozilla.org
User user@host.domain
- Now you can push your work to the repository (and check the result on the dashboard) by entering this command from your local directory:
hg push
And tah dah! You're done! Congratulations on finishing the tutorial. Take a break and grab a snack, you deserve it!