Lesson: Using Other Swing Features
How to Print Tables
The JTable class provides support for printing tables. The JTable printing API includes methods that allow you to implement both basic and advanced printing tasks. For common printing tasks, when you need to simply print a table, use the print method directly. The print method has several forms with various argument sets. This method prepares your table, gets a corresponding Printable object, and sends it to a printer.
If the default implementation of the Printable object does not meet your needs, you can customize the printing layout by overriding the getPrintable method to wrap the default Printable or even replace it altogether.
The easiest way to print your table is to call the print method without parameters. See the code example below.
try {
    boolean complete = table.print();
    if (complete) {
        /* show a success message  */
        ...
    } else {
        /*show a message indicating that printing was cancelled */
        ...
    }
} catch (PrinterException pe) {
    /* Printing failed, report to the user */
    ...
}
When you call the print method with no parameters, a print dialog is displayed, and then your table is printed interactively in the FIT_WIDTH mode without a header or a footer. The code example below shows the print method signature with the complete set of arguments.
boolean complete = table.print(JTable.PrintMode printMode,
                               MessageFormat headerFormat,
                               MessageFormat footerFormat,
                               boolean showPrintDialog,
                               PrintRequestAttributeSet attr,
                               boolean interactive,
                               PrintService service);
When you call the print method with all arguments, you explicitly choose printing features such as a printing mode, a header and a footer text, printing attributes, a destination print service, and also whether to show a print dialog or not, and whether to print interactively or non-interactively. To decide which parameters suit your needs best, see the description of available features below.
The JTable printing API provides the following features:
- Printing Interactively or Non-interactively
- Displaying a Print Dialog
- Adding a Header or a Footer (or Both) to a Printing Layout
- Selecting a Printing Mode
- Automatic Layout and Pagination
Printing Interactively or Non-interactively
In interactive mode a progress dialog with an abort option is shown for the duration of printing. Here is a sample of a progress dialog.
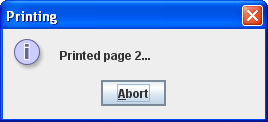
This dialog enables the user to keep track of printing progress. The progress dialog is modal, which means that while it is shown on the screen, the user cannot interact with the table. It is important that your table remain unchanged while it is being printed, otherwise the printing behavior will be undefined. Nevertheless, printing interactively does not block other developer's code from changing the table. For example, there is another thread that posts updates using the SwingUtilities.invokeLater method. Therefore, to ensure correct printing behavior, you should be sure that your own code refrains from modifying the table during printing.
Alternatively, you can print your table non-interactively. In this mode, printing begins immediately on the event dispatch thread and completely blocks any events to be processed. On the one hand, this mode securely keeps the table against any changes until printing is done. On the other hand, this mode completely deprives the user of any interaction with the GUI. That is why printing non-interactively can only be recommended when printing from applications with non-visible GUI.
Print Dialog
You can display a standard print dialog which allows the user to do the following:
- Select a printer
- Specify number of copies
- Change printing attributes
- Cancel printing before it has been started
- Start printing
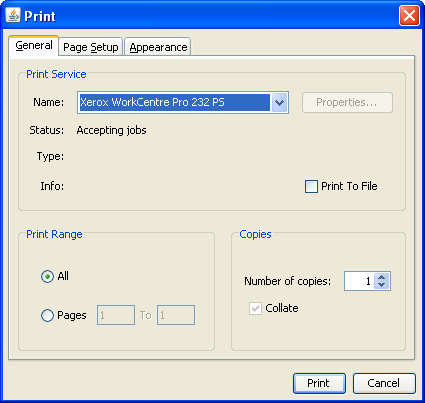
You may notice that the print dialog does not specify the total number of pages in the printout. This is because the table printing implementation uses the Printable API and the total number of pages is not known ahead of printing time.
Adding a Header or a Footer (or Both) to a Printing Layout
Headers and footers are provided by
MessageFormat parameters. These parameters allow the header and footer to be localized. Read the documentation for the
MessageFormat class, as some characters, such as single quotes, are special and need to be avoided. Both headers and footers are centered. You can insert a page number by using {0}.
MessageFormat footer = new MessageFormat("Page - {0}");
Since the total number of pages in the output is not known before printing time, there is no way to specify a numbering format like "Page 1 of 5".
Printing Modes
Printing modes are responsible for scaling the output and spreading it across pages. You can print your table in one of the following modes:
PrintMode.NORMALPrintMode.FIT_WIDTH
In the NORMAL mode a table is printed at its current size. If columns do not fit a page, they spread across additional pages according to the table's ComponentOrientation. In the FIT_WIDTH mode a table has a smaller size, if necessary, to fit all columns on each page. Note that both width and height are scaled to provide an output of the same aspect ratio. In both modes rows spread across multiple pages sequentially with as many rows on a page as possible.
Automatic Layout and Pagination
With the use of the JTable printing API you do not need to take care of layout and pagination. You only need to specify appropriate parameters to the print method such as printing mode and footer text format (if you want to insert the page number in the footer). As demonstrated earlier, you can specify the page number in your footer by including "{0}" in the string given to the MessageFormat footer parameter. In the printed output, {0} will be replaced by the current page number.
Table Printing Examples
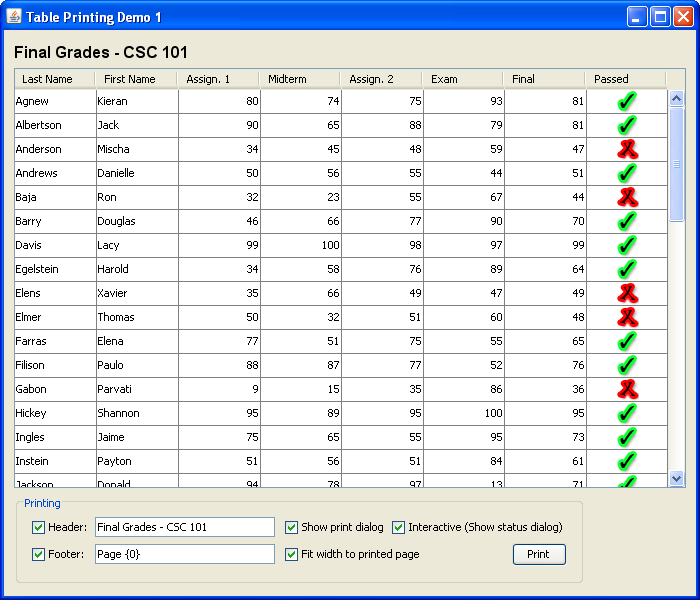
Let us look at an example called TablePrintDemo1. The entire code for this program can be found in
TablePrintDemo1.java. This demo's rich GUI is built automatically by the
NetBeans IDE GUI builder. Here is a picture of the TablePrintDemo1 application.
Try this:
- Click the Launch button to run TablePrintDemo1 using
Java™ Web Start (download JDK 7 or later). Alternatively, to compile and run the example yourself, consult the example index.

- Each checkbox in the bottom part of the application window has a tool tip. Hold the cursor over a checkbox to find out its purpose.
- Edit the text in the Header or Footer checkboxes or both to provide a different header or footer.
- Clear the Header or Footer checkboxes or both to turn the header or footer off.
- Clear the Show print dialog checkbox to turn the print dialog off.
- Clear the Fit width to printed page checkbox to select printing in the
NORMALmode. - Clear the Interactive (Show status dialog) checkbox to turn the print dialog off.
- Click the Print button to print the table according to the selected options.
Whenever a web-launched application tries to print, Java Web Start pops up a security dialog asking the user for permission to print. To proceed with printing, the user has to accept the request.
Note when you clear the Interactive checkbox, a message appears that warns the user about the disadvantage of printing non-interactively. You can find the printing code in the PrintGradesTable method. When called, this method first obtains the set of selected options from the GUI components and then calls the print method as follows.
boolean complete = gradesTable.print(mode, header, footer,
                                     showPrintDialog, null,
                                     interactive, null);
The value returned by the print method is then used to show either the success message or the message saying that the user cancelled printing.
Another important feature is the table printing API's use of table renderers. By using the table's renderers, the API provides a printed output that looks like the table on the screen. Look at the last column of the table on the screen. It contains custom images denoting the passed or failed status of each student. Now look at the printed result. You can see that the check and X marks look the same.
Here is a picture of the TablePrintDemo1 printed result in the FIT_WIDTH mode.

This figure has been reduced to fit on the page.
Click the image to view it at its natural size.
TablePrintDemo2 Example
The TablePrintDemo2 example is based on the previous demo and has an identical interface. The only difference is in the printed output. If you look at the TablePrintDemo1's printed result more attentively, you may notice that the check and X marks are fuzzy. The TablePrintDemo2 example shows how to customize the table to make the images more distinguishable in the table printout. In this demo, the overridden getTableCellRendererComponent method finds out whether the table is being printed and returns clearer black and white images. If the table is not being printed, it returns colored images that you can see on the screen.
Click the Launch button to run TablePrintDemo2 using Java™ Web Start (download JDK 7 or later). Alternatively, to compile and run the example yourself, consult the example index.
The
isPaintingForPrint method defined in the JComponent class allows us to customize what we print compared with what we see on the screen. The code of the custom cell renderer, taken from
TablePrintDemo2.java, is listed below. This code chooses which images to use depending on the value returned by the isPaintingForPrint method.
    /**
     * A custom cell renderer that extends TablePrinteDemo1's renderer, to instead
     * use clearer black and white versions of the icons when printing.
     */
    protected static class BWPassedColumnRenderer extends PassedColumnRenderer {
            public Component getTableCellRendererComponent(JTable table,
                                                           Object value,
                                                           boolean isSelected,
                                                           boolean hasFocus,
                                                           int row,
                                                           int column) {

            super.getTableCellRendererComponent(table, value, isSelected,
                                                hasFocus, row, column);

            /* if we're currently printing, use the black and white icons */
            if (table.isPaintingForPrint()) {
                boolean status = (Boolean)value;
                setIcon(status ? passedIconBW : failedIconBW);
            } /* otherwise, the superclass (colored) icons are used */

            return this;
        }
    }
Here is a picture of the TablePrintDemo2 printed result in the FIT_WIDTH mode.
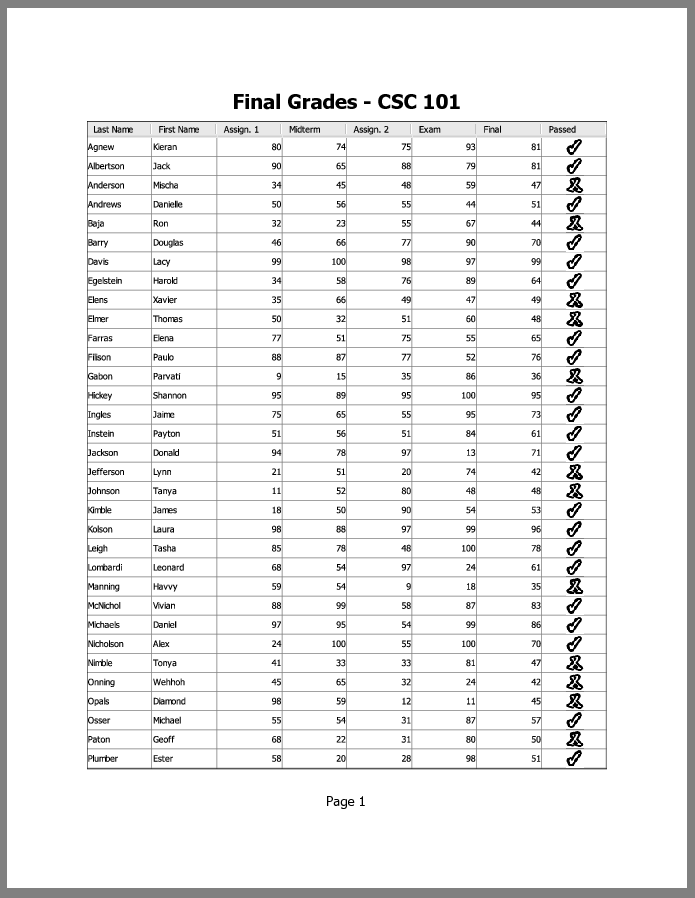
This figure has been reduced to fit on the page.
Click the image to view it at its natural size.
TablePrintDemo3 Example
The TablePrintDemo3 example is based on the two previous demos. This example shows how to provide a customized Printable implementation by wrapping the default Printable with extra decoration. This demo has a similar interface but the Header and Footer checkboxes are disabled since the customized printable object will provide its own header and footer.
Click the Launch button to run TablePrintDemo3 using Java™ Web Start (download JDK 7 or later). Alternatively, to compile and run the example yourself, consult the example index.
This example prints the table inside an image of a clipboard. Here is a picture of the printed result in the FIT_WIDTH mode.
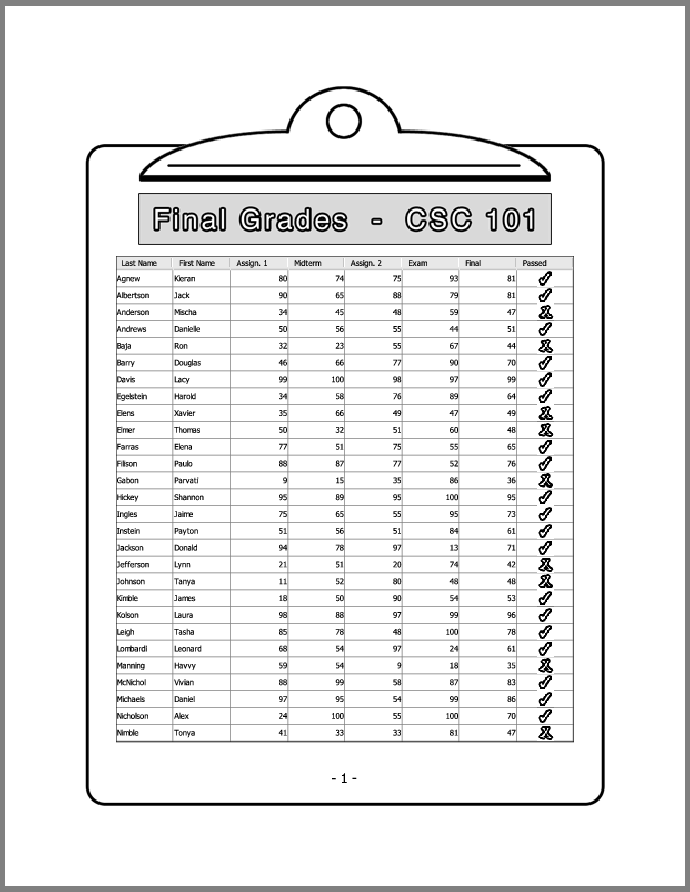
This figure has been reduced to fit on the page.
Click the image to view it at its natural size.
The entire code for this program can be found in
TablePrintDemo3.java. In this demo, a custom subclass of the JTable class is used called FancyPrintingJTable. This FancyPrintingJTable class overrides the getPrintable method to return a custom printable object that wraps the default printable with its own decorations and header and footer. Here is the implementation of the getPrintable method.
public Printable getPrintable(PrintMode printMode,
                              MessageFormat headerFormat,
                              MessageFormat footerFormat) {

     MessageFormat pageNumber = new MessageFormat("- {0} -");

     /* Fetch the default printable */
     Printable delegate = super.getPrintable(printMode, null, pageNumber);

     /* Return a fancy printable that wraps the default */
     return new FancyPrintable(delegate);
}
The FancyPrintable class is responsible for wrapping the default printable object into another printable object and setting up the clipboard image. When an instance of this class is instantiated, it loads the images needed to assemble the clipboard image, calculates the area required for the clipboard image, calculates the shrunken area for the table, prints the table into the smaller area, and assembles and prints the clipboard image.
Pay attention to the flexibility of the code that assembles the clipboard image with respect to the page size. The code takes into account the actual page dimensions and puts together the auxiliary images, stretching some of them as necessary so that the final clipboard image fits the actual page size. The picture below shows the auxiliary images and indicates how those images form the final output.

This figure has been reduced to fit on the page.
Click the image to view it at its natural size.
The Table Printing API
This section lists methods defined in the JTable class that allow you to print tables.
| Method | Purpose |
|---|---|
|
boolean print() boolean print(printMode) boolean print(printMode, MessageFormat, MessageFormat) boolean print(printMode, MessageFormat, MessageFormat, boolean, PrintRequestAttributeSet, boolean) boolean print(printMode, MessageFormat, MessageFormat, boolean, PrintRequestAttributeSet, boolean, PrintService) |
When called without arguments, displays a print dialog, and then prints this table interactively in the FIT_WIDTH mode without a header or a footer text. Returns true if the user continued printing and false if the user cancelled printing.When called with a full set of arguments, prints this table according to the specified arguments. The first argument specifies the printing mode. Two MessageFormat arguments specify header and footer text. The first boolean argument defines whether to show a print dialog or not. Another boolean argument specifies whether to print interactively or not. With two other arguments you can specify printing attributes and a print service.Whenever a PrintService argument is omitted, the default printer will be used. |
| Printable getPrintable(PrintMode, MessageFormat, MessageFormat) | Returns a Printable for printing a table. Override this method to get a customized Printable object. You can wrap one Printable object into another to get various layouts. |
Examples That Use Table Printing
This table lists examples that use table printing and points to where those examples are described.
| Example | Where Described | Notes |
|---|---|---|
TablePrintDemo |
How to Use Tables | Demonstrates basic features in table printing such as displaying a print dialogue, and then printing interactively in the FIT_WIDTH mode with a page number as a header. |
TablePrintDemo1 |
This page | Demostrates the basics of table printing and provides a rich GUI. Allows the user to specify a header or a footer text, select the printing mode, turn the print dialog on or off, and select printing interactively or non-interactively. |
TablePrintDemo2 |
This page | Based on the TablePrintDemo1, this example has an identical interface. This demo shows how to customize the table so that the printed result looks differently compared to the table being shown on the screen. |
TablePrintDemo3 |
This page | This demo shows advanced table printing features such as wrapping the default table printable into another printable to get a different layout. |
Next page: How to Print Text