| Oracle® Warehouse Builder Installation and Administration Guide 11g Release 2 (11.2) Part Number E17130-05 |
|
|
PDF · Mobi · ePub |
| Oracle® Warehouse Builder Installation and Administration Guide 11g Release 2 (11.2) Part Number E17130-05 |
|
|
PDF · Mobi · ePub |
This section describes how to install Oracle Warehouse Builder on the server.
This section includes the following topics:
"Installing Oracle Warehouse Builder on Oracle Database 11g Release 2"
"Working with Oracle Warehouse Builder Standalone Install Package"
"Installing Oracle Warehouse Builder Through Oracle Universal Installer"
"Installing Oracle Warehouse Builder in Oracle RAC Environments"
Oracle Warehouse Builder is part of the standard installation on all hosts running Oracle Database 11g Release 2. When Oracle Database is installed, you must only unlock the OWBSYS and OWBSYS_AUDIT accounts. The OWBSYS schema contains all Oracle Warehouse Builder repository metadata, and the OWBSYS_AUDIT schema is used by the Oracle Warehouse Builder Control Center Agent to access the heterogeneous execution audit tables of the OWBSYS schema.
Managing Optional Features for Oracle Warehouse Builder Installations
Although many features in Oracle Warehouse Builder are included in Oracle Database licenses, some features may require additional licensing. As an administrator, you can assist in managing license compliance by enabling or restricting user access to optional features. The management of optional features as described here is entirely voluntary.
When you first implement an Oracle Warehouse Builder repository, all optional features are enabled by default. You can modify these settings when you create the first workspace for the repository or you can modify the settings at a later time.
To manage the usage of optional features
Start the Repository Assistant. Select Start, Programs, ORACLE_HOME, Warehouse Builder, and then Administration.
If you are creating the first workshops for the repository, then the Repository Assistant automatically displays the Enable Optional Features page.
If you are modifying an existing repository, then on the Choose Operation page, select Manage Optional Features.
Select the options you want to make available to Oracle Warehouse Builder users.
The selections you make are enforced repository-wide and apply to all users. If a user is logged into Oracle Warehouse Builder client when you make changes on the Enable Optional Features page, then the changes are enforced for that user the next time they log in to the client.
Note:
For more information about each option, refer to the appropriate Oracle licensing information guide, listed on Oracle Technology Network athttp://www.oracle.com/technetwork/developer-tools/warehouse/overview/index.htmlThere are several situations when you must download and install the Oracle Warehouse Builder 11g Release 2 standalone install package:
You are installing Oracle Warehouse Builder 11.2 and hosting an Oracle Warehouse Builder Repository on an earlier release:
Oracle Database 10g Release 1, Oracle Database 10g Release 2,
or
Oracle Database 11g Release 1.
You run the Oracle Warehouse Builder 11.2 Design Client on a developer's computer.
You are installing Oracle Warehouse Builder 11.2 on a computer that runs the Control Center Agent.
To obtain Oracle Warehouse Builder Standalone Software:
Navigate the browser to the following URL:
http://www.oracle.com/technetwork/developer-tools/warehouse/overview/index.html/
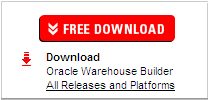
On the right side of the page, click All Releases and Platforms.
Under Oracle Warehouse Builder Downloads, select Accept for the licence agreement.
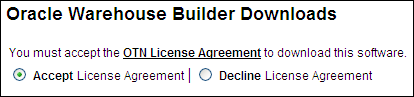
The system displays the following message: "Thank you for accepting the OTN License Agreement; you may now download this software."
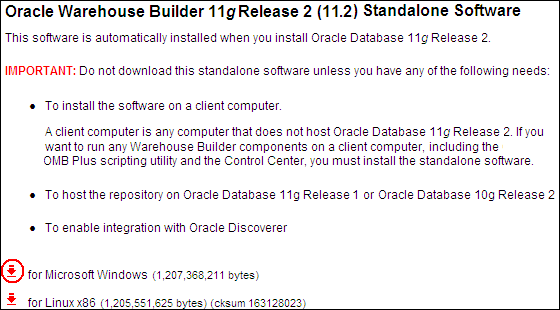
Under the Standalone Software download, click the down arrow beside the platform of your choice to download the zip file that contains Oracle Warehouse Builder.
On Windows: choose the Microsoft Windows option.
On Linux: choose the Linux x86 option.
When the download is complete, extract the zip file into a temporary directory. For example,
On Windows: use C:\temp\OWB.
On Linux: use /temp/OWB.
After you obtain the standalone installation files for Oracle Warehouse Builder and extract them, you must install the software.
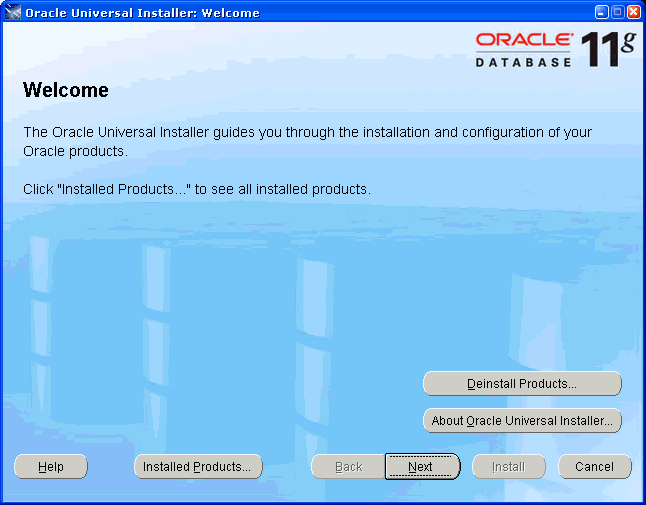
To install Oracle Warehouse Builder using Oracle Universal Installer:
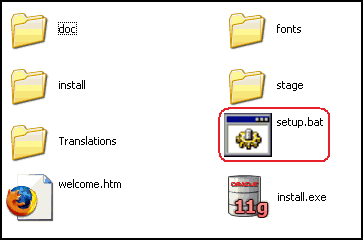
In Windows Explorer, navigate to the directory that contains the extracted Oracle Warehouse Builder installation files. In this discussion the sample directory is C:\temp\OWB.
Click the setup.bat file to start the Universal Installer.
On the Welcome screen, click Next.
On the Specify Home Details screen, specify a new Oracle home:
Enter the Oracle home Name, for example, OWB112.
Enter or browse to Path C:\.
Click Next.
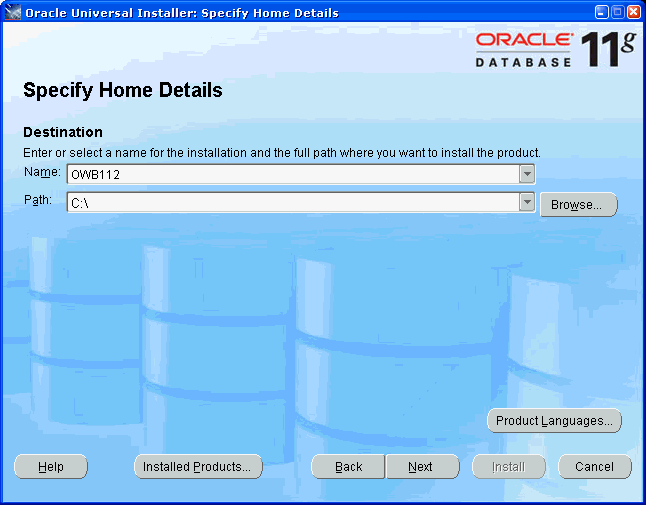
Tip:
To ensure a successful installation:Do not use an existing Oracle home.
Do not use any spaces in the directory path.
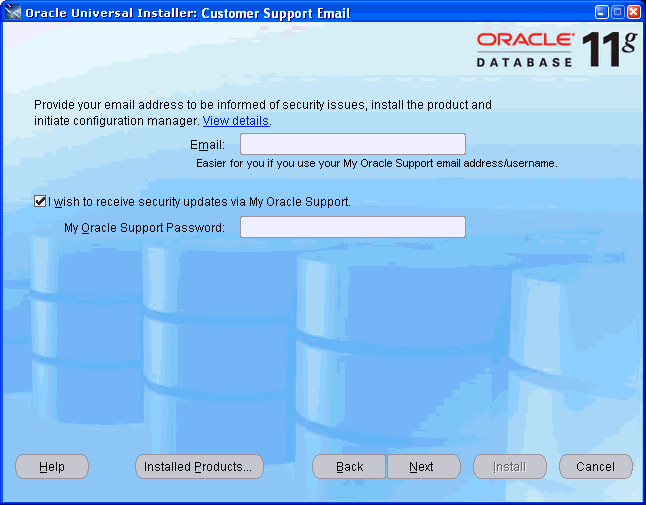
[Optional] On the Customer Support Email screen, enter the Email and Password for your My Oracle Support account.
Click Next.
On the Summary screen, click Install.
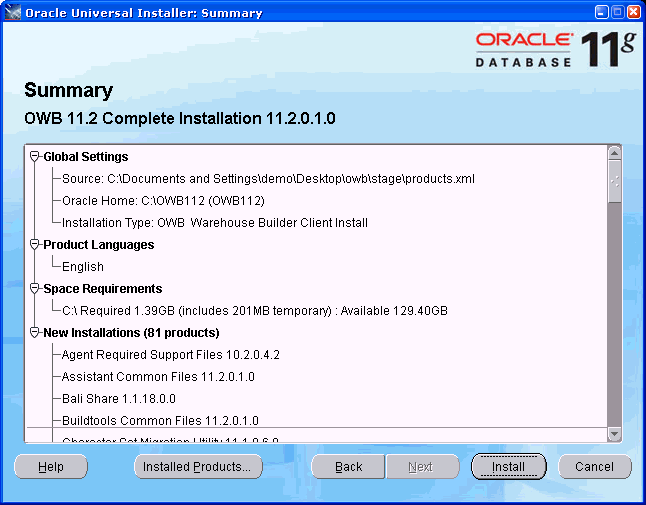
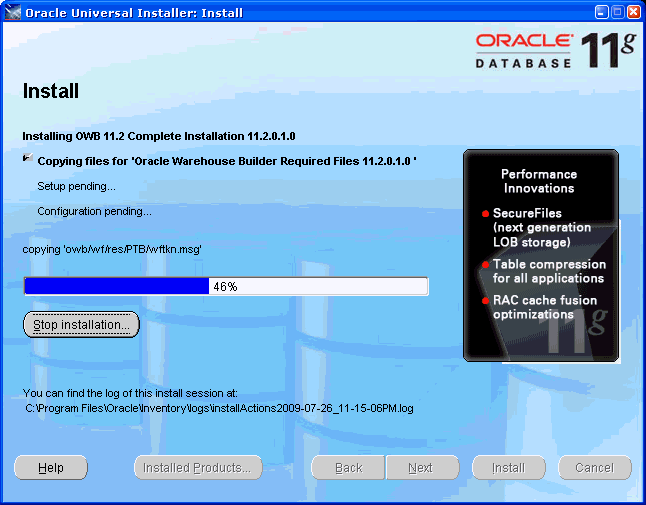
The Install screen shows progress during the installation process.
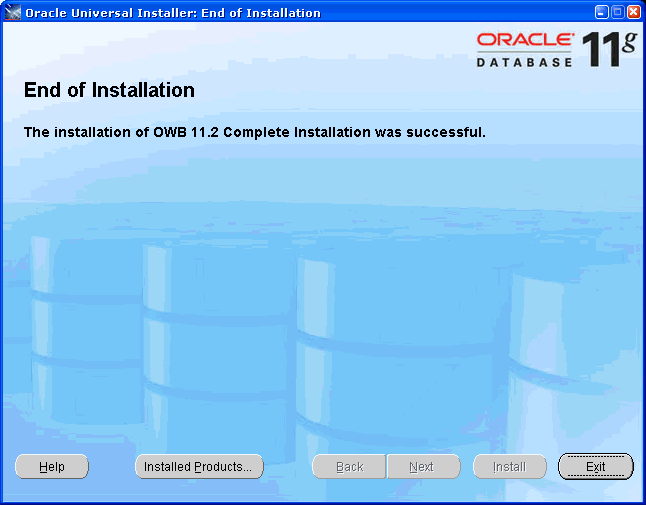
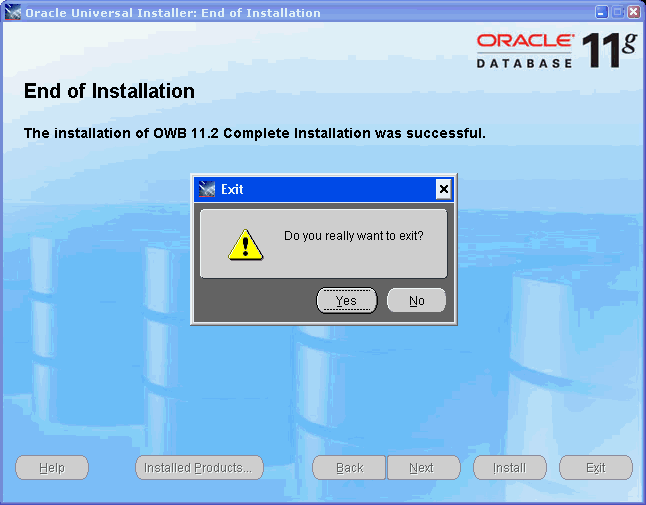
At the End of Installation screen, click Exit. The Exit message appears asking if you really want to exit.
In the Exit message, click Yes.
The overall process for installing on an Oracle RAC environment is similar to the general process for installing a single-instance database. However, there are a few specific details to observe as noted in this section.
To install and configure Oracle Warehouse Builder for Oracle RAC:
Create the Oracle RAC environment as described in Oracle Real Application Clusters Installation Guide specific to your platform. Cross references to generic installation guides are given after the last step of this procedure.
If you have not done so, review the most recent Oracle Warehouse Builder Release Notes available with the installation media.
See Also:
Note ID 810394.1 "Oracle RAC and Oracle Clusterware Starter Kit and Best Practices" on My Oracle Support at https://support.oracle.com
Oracle Database Release 11.2 documentation library page at http://www.oracle.com/pls/db112/homepage
The product download page on at http://www.oracle.com/technetwork/indexes/downloads/index.html
Prepare the host computers.
For each computer to host Oracle Warehouse Builder components, configure the tnsnames.ora file located in the OWB_HOME\owb\network\admin directory.
Configure tnsnames.ora for each Oracle Database server to be an Oracle Warehouse Builder data source or target. If you fail to configure tnsnames.ora for any host or database server, then you may encounter a repository connection error.
See Also:
"ORA-12154: TNS: Could not resolve service name." for troubleshooting.(Optional.) If necessary, install Oracle Warehouse Builder standalone software. However, this is generally not necessary because Oracle Warehouse Builder is installed as part of every Oracle Database 11g Release 2 installation.
Create your first workspace within Oracle Warehouse Builder Repository. The Repository Assistant prompts you and guides you with procedures.
To start the Repository Assistant on Windows, from the Windows Start menu, select Programs and navigate to the Oracle product group you installed in the previous step. Select Oracle Warehouse Builder, Administration, and then Repository Assistant.
To start the Repository Assistant on UNIX, locate OWB_HOME/owb/bin/unix and run reposinst.sh.
Register each Oracle RAC node.
For each node, start the Repository Assistant and select the Advanced Set Up option. Connect to the node using Host:Port:Sid, where Host is the physical node name. Select the option for registering the Oracle RAC instance.
If the software is installed on separate disks, copy rtrepos.properties to each node in the cluster.
If you did not install to a shared disk, then you must manually copy the file OWB_HOME/owb/bin/admin/rtrepos.properties from the primary node to each node in the cluster.
Install the Oracle Warehouse Builder software on the client computers.
Repeat the procedure in "Installing Oracle Warehouse Builder on Oracle Database 11g Release 2" for each computer to be used as a client.
After completing the installation process, you can start all the Oracle Warehouse Builder components.
Because you can connect to Oracle Warehouse Builder repositories using a net service name, you can embed Oracle RAC properties into the connect string to use Oracle RAC capabilities such as connect time failover, load balancing on server and load balancing of connections.
Refer to, "Ensuring the Availability of Service Names for Oracle RAC Nodes".
The Control Center Service requires that service names for the individual nodes in the cluster be available. If these are not present after the Oracle RAC installation, then you must manually ensure the availability.
See Also:
Whether you are installing Oracle Warehouse Builder components onto a server or a client computer, you use the Oracle Universal Installer to install Oracle Warehouse Builder components.
For Oracle RAC, it is recommended that you install the Oracle Warehouse Builder components on each node of the cluster. The Control Center Service is required on to each node of the Oracle RAC cluster. You can achieve this in a single installation of the Oracle Warehouse Builder software if you install on a shared disk such as an OCFS or NTS shared disk.
Before starting Oracle Universal Installer, review and complete the "Checklist: Before Using the Universal Installer in an Oracle RAC Environment".
This section contains additional points to address before starting the Universal Installer:
If you have not done so, review the latest Oracle Warehouse Builder Release Notes at http://www.oracle.com/technetwork/index.html
The installed location must be the same directory path if using separate OWB_HOME installed disks, that is, local physical disks on each server.
Close all other open applications.
To run the Oracle Universal Installer in an Oracle RAC environment:
Ensure that you are logged on to your system as a member of the Administrators group.
Insert the Oracle Warehouse Builder CD-ROM.
If your computer supports the autorun feature, then the autorun window automatically starts Oracle Warehouse Builder installation.
If your computer does not support the autorun feature, locate the executable setup.exe in the root directory of the CD-ROM or downloaded software. Start the installer by starting the setup.exe program.
When prompted to specify the cluster node, you can select all hosts or the local node.
If you select local node, then you must install Oracle Warehouse Builder separately for each system unless installing to a shared disk.
When prompted, specify a home directory to be used only for Oracle Warehouse Builder installation.
For example, specify a path such as C:\oracle\owb11_2.
For the sake of brevity, the path you specify in this step is referred to as OWB_HOME throughout this guide.
Follow the on screen instructions.
When the software installation completes successfully, you can continue with the next step in "Installing Oracle Warehouse Builder in Oracle RAC Environments".
You can run Oracle Universal Installer from the CD-ROM. Do not run Oracle Universal Installer while the CD-ROM directory is the current directory because you cannot later unmount the next CD-ROM when prompted to do so.
To run the Oracle Universal Installer in an Oracle RAC environment:
To enable clusterware installation, ensure that you run an interactive secure shell such as /bin/ssh and have host user equivalency to all nodes.
Log in as the operating system user of the Oracle Database.
For example, log in as the oracle user.
Be sure you are not logged in as the root user when you start Oracle Universal Installer. If you log in as root user when you start Oracle Universal Installer, then only the root user has permissions to manage Oracle Warehouse Builder.
Start the installer by entering the following at the prompt:
cd mount_point
./runInstaller
When prompted to specify the cluster node, you can select all hosts or the local node.
If you select local node, then you must install Oracle Warehouse Builder separately for each system unless installing to a shared disk.
As the installation proceeds, the Oracle Universal Installer prompts you to run several scripts. You must switch users and run the script as root.
When the software installation completes successfully, you can continue with the next step in "Installing Oracle Warehouse Builder on Oracle Database 11g Release 2".
List all of the instance or node names in the cluster. Issue the following command:
srvctl config database -d dbname
where dbname is the unique database name as specified by the initialization parameter db_name.
For a given instance, instn, add a service with the following command:
srvctl add service -d dbname -s instn -r instn
The resulting service name is instn.clusterdomainname. For example, if the instance name is abcdef1, then the service name could be abcdef1.example.com.
For a given instance, instn, start the service with the following command:
srvctl start service -d dbname -s instn
For a given instance, instn, verify the service is running with the following command:
srvctl status service -d dbname -s instn
Complete steps 2 through 4 for each node.
An Oracle Universal Installer silent installation runs in the background and does not require input from the user. Instead of prompting the user to select a series of installation options, the software uses a pre-defined set of options stored in a response file or passed on the command line.
A response file specifies the information normally provided by the user to Oracle Universal Installer interface during an interactive installation session. Each answer is stored as a value for a variable identified in the response file. For example, values for Oracle home or install type can be set automatically within the response file.The response file template for the installation of your product can be found on your stage (CD-ROM) under the root_of_CD/response directory, such as:
Products.xml_Location/Response/product.installtype.rsp
To perform a silent installation of Oracle Warehouse Builder
Open a Command window and navigate to the directory containing the response file that is used for the silent installation. Use the following command to start the silent installation:
On Windows, enter setup -responseFile filename optional_parameters
On Linux, enter runInstaller -responseFile filename optional_parameters
For this procedure, filename represents the name of the response file (including the complete path) and optional_parameters represents the parameters used for the silent installation.
After Oracle Warehouse Builder software is installed on your computer, you must configure it.
For steps on configuring Oracle Warehouse Builder on Linux, see Chapter 4, "Configuring Oracle Warehouse Builder for Linux".
For steps on configuring Oracle Warehouse Builder on Microsoft Windows, see Chapter 3, "Configuring Oracle Warehouse Builder for Windows".
|
Copyright © 2000, 2011, Oracle and/or its affiliates. All rights reserved. Legal Notices |
|